Pasta e fagioli with chicken

Pasta e fagioli

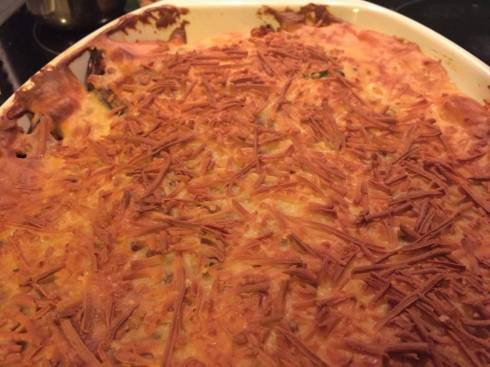
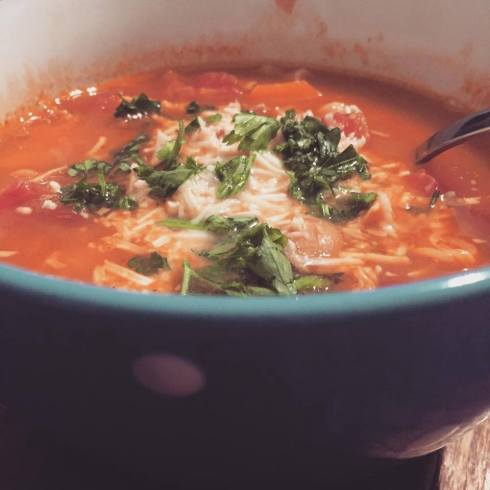
Pasta e fagioli is a classic italian recipe, a «primo» you will find anywhere in the italian peninsula, from the northest parts of Trentino – Alto Adige to the southest corners of Sicily. It has its roots deeply immersed in the history of the rural parts of the country and, frankly, I don’t know many Italians that haven’t tasted it and/or love it. There are as many recipes as there are families, but the main thing you need to remember is this: small pasta and beans. Lots of beans. And tomato.

As far as this particular dish we cooked goes, we had to improvise a bit, since we decided to make it at the very last minute. OK, that’s not entirely true, we decided to make it in the morning, but there were leftovers that needed to go, so we changed things a bit and added leftover rotisserie chicken. Because we had it. We also added a (very very hot) red chili pepper from our own pepper plant, because we wanted to try it. Yes, it was the very first chili from our own plant and it was fan-ta-stic. All in all, comfort food at its best.

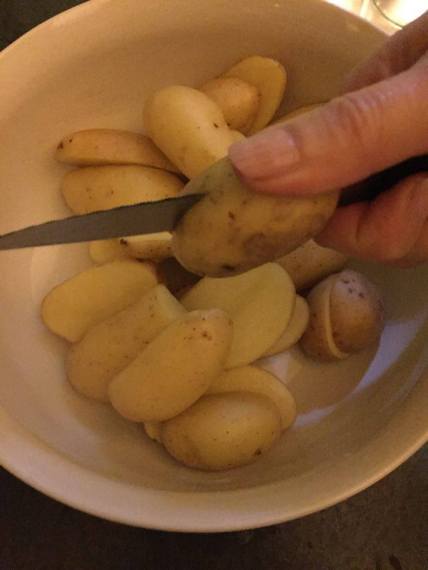
One note: You are welcome to use canned beans and you are welcome to use any beans you like. We used dry cannellini beans, because that’s what we had in our jars, but anything is fine. We boiled the beans for more than two hours before using them in our dish, a step which, of course, you will skip if you are using canned beans. Also, keep in mind that dry beans take less time to boil if you soak them in water from the night before. In other words, don’t take our word for the time needed, always test your food.

Now, let me see if I remember everything we did.

What you’ll need:

½ cup dry beans, which you will boil along with some bay, a little oil, pepper. I always add a little lemon at the end.

Some pancetta, prosciuto or bacon (I used 4 rashers of bacon. They weren’t very thin, fyi)

2 carrots

1 large onion

1 red chili pepper from your garden (or from the supermarket) (optional)

(celery – I didn’t use any because we don’t like it, but everyone else loves it)

A couple of bay leaves

Some rosemary

Some thyme or oregano

About ¾ cup of ditalini

1 can crushed tomato

1-2 cups of rotisserie chicken

1 litre of chicken broth, vegetable broth or water

What you’ll do

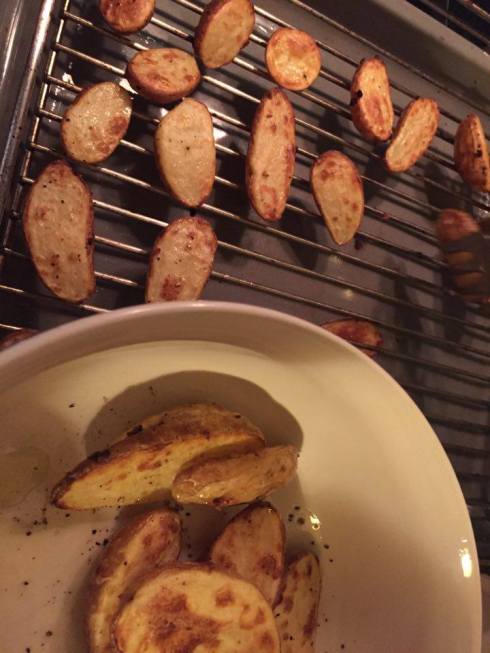
  1. Ready the beans, by boiling them for endless hours, until they are ready.
  2. Chop the carrots, the onion, the chili pepper and the garlic (and the celery, if using).
  3. Cut the bacon in not-very-small pieces. Heat some olive oil in a pot over medium heat and add the bacon. Let it render some of its fat and then add the veggies (garlic included), the bay leaves (break them in half first), the rosemary and thyme or oregano and give them a swirl. Add some salt and pepper and let them cook for 4-5 minutes.
  4. Add the tomato and bring everything to a boil.
  5. Add the beans along with about a cup of its juice. The thicker it is, the better. Bring to a boil again.

5 and a half. If you want, you can take about a cup of the bean mixture as it has cooked by now and blend it, then pour it back in the pot. That will make your mixture thicker, and, according to the old Italians, the thicker the better.

  1. Add the chicken, let it be incorporated with the rest and then add the broth (or water, whatever you are using). Bring everything to a boil.
  2. Once everything is boiling, add the pasta and let it boil. Cook for as long as the pasta needs to be prepared. At some point, taste for seasoning.
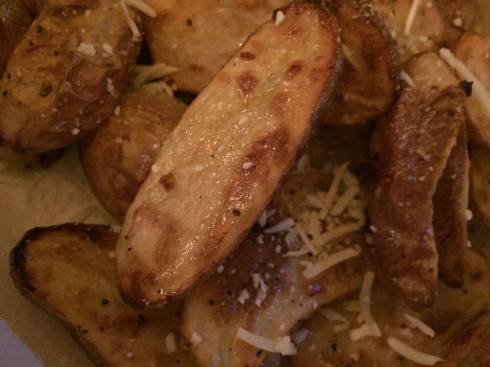
  3. Serve with some Parmesan cheese and some parsley.

This recipe yields 3-4 servings, depending on how much you eat and whether you are having it as a primo or secondo.


The easiest, and (possibly one of) the most delicious, apple “pie”

24726248_10155352707206443_801788463_o

There are a lot of apple dessert recipes online that claim to be easy and delicious and “light” at the same time and more often than not that is not the case. This recipe, however, is one of those that actually combines all those three elements. It will take you no more than 15 minutes to prepare and it is absolutely mouth watering even if you use just a couple of tablespoons of sugar and two tablespoons of butter (which makes it one of the least fattening desserts you can find).

Based on a recipe found on Bon Appetit this apple “pie” is perfect for every time you want some comfort food and an easy, yet delicious, treat for times when friends come over and you don’t really have too much time to prepare something.

24474906_10155352707061443_1636686127_o

*Note: I prefer not to quantify spices. Just add as much as you like. Spices depend on taste and preference. What I do is, I add the spices, as much as I think will be ok, then smell it and if it smells good for me, that’s how much I use. As a rule of thumb, I usually start with about 1 tsp of each spice.

What to do

Serves: 3

2 tablespoons unsalted butter

3 large apples

3 tablespoons dark brown sugar (you can use less if you want to, it doesn’t make that big of a difference)

2 tablespoons all-purpose flour

1 tablespoon vanilla extract

Ground cinnamon

Ginger

½ teaspoon salt

½ lemon

1 sheet frozen puff pastry, thawed

Some granulated sugar (for sprinkling)

How to do it

Preheat the oven to 230° C and brown the butter. Clean and cut the apples in small and larger pieces and place them in the pan you will bake them in. Add the sugar, flour, vanilla extract, cinnamon, ginger, salt, lemon (and some lemon zest) and some of the butter and mix everything together.

24725984_10155352707451443_474712530_o

Cut the pastry in small and larger pieces and place it on top of the apples. Brush the pastry with the rest of the butter and sprinkle some sugar on top. Bake for 35 minutes. Then lower the temperature to 160° C and bake for another 30 minutes.

24623802_10155352707251443_1933484279_o

Take out of the oven and with the back of a spoon press some of the pieces in the apple juices (optional). Let it rest for a while and enjoy!


Curry, spice and everything nice

Screen Shot 2016-08-09 at 18.30.15

I am still looking for that one person that has no problem eating meat during the summer.

Ok, alright, hands down, I get it, it’s only me. Still, when the day gets hot, my appetite for meat diminishes to zero level. With the temperature nearing 40 degrees Celsius (sometimes higher), one has no choice but to eat light, in order to keep cool. So the challenge for me is to make meat as tasty and light as possible.

This is where spices come in. I don’t know if it is true, but in my mind it goes something like this: India is hot, Indians eat spices –> spices are good during heat waves. I choose to not look it up and just go with this forever!

In the interest of making meat appealing to me, I employ a curry powder recipe taught to me by a friend, more than a decade ago, in NYC. I am pretty sure I have changed the quantities dramatically in the course of the years, but this is how I have been making it and how we have come to like it.

Today, I seasoned half a chicken breast with salt, pepper and our curry powder and simply cooked it on a non-stick pan with not a drop of oil. You can use oil if you want, but I’m keeping everything light.

Along with the chicken, we had a nice lettuce salad, with lots of lemon and a drizzle of olive oil, and a dill-less tzatziki, made with:

1 cup 0% yoghurt

1 very small cucumber, diced

1 clove garlic

2-3 TB lemon juice

1 tsp olive oil

salt, pepper


Curry powder

The curry powder recipe includes coriander, cumin, turmeric, ginger, dry mustard and paprika. I am sure she gave me the right quantities, but the way I now make it is this:

The curry powder is made of ten parts.

5 parts ground coriander seeds

2 parts ground ginger

2 parts ground cumin

1 part turmeric

1 part (or maybe a bit less) dry mustard

1 part (again, if you want, a bit less, or noticeably less) paprika


Mix all the parts well. Store it in an airtight container. It goes fast, especially if you are anything like me and use it everywhere.


Remember that everything is best enjoyed with good company.

Screen Shot 2016-08-09 at 18.30.44.png

The cats were begging


Moroccan-style pasta

Screen Shot 2016-04-14 at 23.08.14
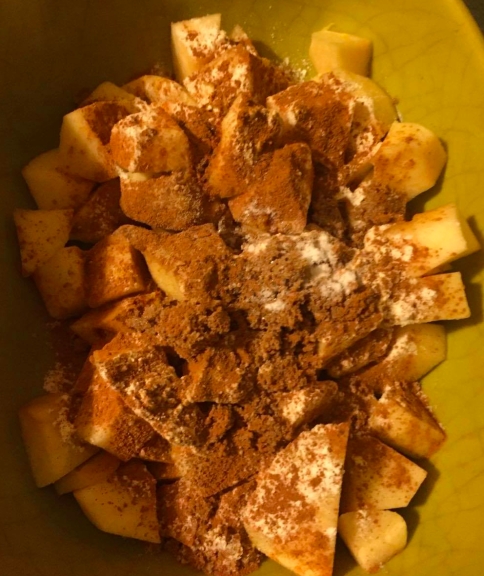
I used to feel like there’s nothing better and quicker to create tiny explosions of taste in a relatively simple dish that cinnamon or cumin. Or both. Then, it was Gino D’Acampo that introduced me to the crackling, satisfying feeling of toasted almonds in a dish, and he did it with his Moroccan – style pasta.

This recipe is very heavily based on Gino’s recipe in his book Fantastico!: Modern Italian Food – I’m saying “based” and not “taken from the book, simply because I have left out the coriander (which I simply cannot stand) and, quite frankly, am liberally seasoning the dish with cinnamon and cumin. One teaspoon is simply never enough. We also used tagliatelle.

We also almost omitted the oil (you will notice we only use about a teaspoon and a half at the beginning) because we are on a diet.

Stop laughing!

Stop!

OK, now that you’re all better, let’s move on.

We also #fooked*, because it had been a while and we had missed it! Those of you who are new to fooking, I hope you enjoy it.

Ingredients

1 onion, sliced

About 4-5 tomatoes, diced

Cinnamon and cumin

About 1 cup cooked chickpeas (we cooked ours)

About 100gr flaked almonds

About 250gr tagliatelle

Parsley


Preparation

Start by cooking the chickpeas, if they are not already cooked. You know, no salt while they are cooking, then add some at the end and don’t forget the lemon.

Add the onions with some oil in a deep pan and cook them for about five minutes, until soft and slightly brown. Add the diced tomatoes and the spices. Let it cook for about 15-20 minutes, until the tomatoes have broken down, their juices are making a nice, thick sauce and the aroma is filling your house.

Meanwhile, cook the tagliatelle and, in a small pan, toast the flaked almonds. That’s really easy to do, just put the almonds in a small saucepan over medium heat. Also remember to toss them every once in a while, because they will burn quickly if you don’t.

When your sauce is nice and ready, add the chickpeas and cook for a further five minutes. Or longer if you want. What you are looking for is for all the smells to integrate with the chickpeas. When it’s done, add the tagliatelle and the parsley (keep a little bit to add when you serve) and cook for another a minute.

When it’s done, serve it, add the almonds and some more parsley and serve immediately.

Enjoy it with some cold beer (Mr. S added some feta cheese too, but what else is new!)

As always, let us know what you think!

Grazie Gino!


* Cooking with the Foo Fighters


Cumin mushrooms and pancetta quesadilla

cumin mushroom quesadilla
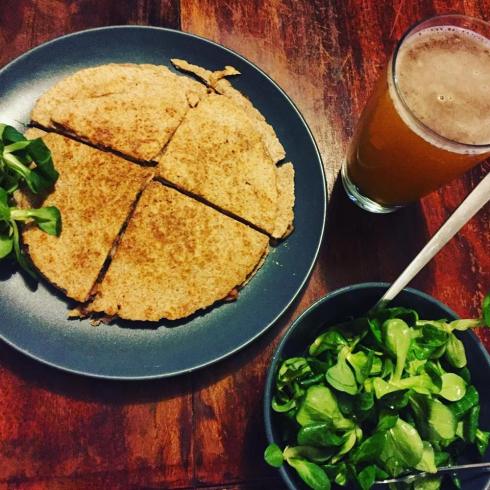
Saturday night usually calls for Supernatural. And Supernatural usually calls for a snack – mainly because Dean always eats something, and then we get start to drool and then we lose our concentration and the whole world knows that Supernatural demands our full attention, so we like to be prepared.

Last night we tried to keep it simple, because of everything that we have eaten these past few days. Our favorite Canteen reopening this Sunday was also a huge factor to our trying to keep the calorie intake to a minimum (well… ok… we’ll call this a “minimum” and we’ll all stay friends, ok?). When trying to do that, veggies help, and whole-wheat products help and, of course, pancetta doesn’t help much, but we’ll just keep this between us.

I won’t even call this a recipe. It is merely a suggestion for the next time you crave for something and don’t know what to make. Most houses have a few mushrooms, some tortillas, some pancetta (or bacon), some cheese, a few peppers…

By the way, there were no peppers in this house last night, so I didn’t use any, but I’ll add them to the “suggestion”, because I really wish there were.


Ingredients

250gr mushrooms, sliced

4 slices pancetta

½ onion

1 red bell pepper, sliced

4 slices yellow cheese (we used Gouda)

4 tortillas

A pinch of cumin


Preparation

Heat some oil in a large pan and add the pancetta to your desired doneness. Remove pancetta from the pan. Add the onion and the pepper and cook over medium heat until soft. Add the mushrooms, some salt and pepper and the cumin. Cook about 7-8 minutes, or until the mushrooms are done.

Remove from the pan. At this point, if you have a non-stick pan, don’t even bother with cooking spray. I used nothing and nothing stuck! If your pan is not non-stick, then add some cooking spray. Place one tortilla on the pan, over medium heat. On it, place a slice of cheese, some mushroom mixture, two pancetta slices and another cheese slice. Top it off with another tortilla. Cook on one side for about 3-4 minutes or until tortilla is nice and crispy. Very carefully flip your quesadilla over and cook it for another couple of minutes.

Remove it from the pan and place on a plate. Repeat for the second quesadilla.

We placed one on top of the other, cut them both with a serrated knife in four and enjoyed it with some weissbier and a simple valeriana salad (dressed only with some salt, pepper, lemon and olive oil). And with Sam and Dean, of course!


Jamaican spiced chicken and curry flavored brown rice fajitas

Jamaican fajitas

It’s a sunny mid March Sunday, you go out for a stroll, maybe some coffee and some hanging out in the sun, and when you get back home you find yourself desperately looking for something nice to eat. Preferably something that can be prepared in no time and taste like, well… a sunny springtime Sunday.

So, how about some fajitas? Jamaican spiced chicken and curry flavored brown rice (basmati rice is also great) fajitas to be exact. That’s what we thought and fortunately for us, we thought about it before we went out for that stroll, which was helpful because it meant that we took the chicken out of the freezer so that it would be ready to be cooked by the time we came back!

(But, you know… Having a microwave that is not broken like ours is something that can do the defrosting job if you don’t think about cooking chicken before you go out for a walk!).

So. All you need is some chicken (we used three chicken thighs), a cup of rice (we used brown rice), an onion, a red pepper, one tomato, a couple of lettuce leaves, a few tortillas and about 30-35 minutes.


Ingredients

3 chicken thighs

1 cup of brown rice

1 onion

1 red pepper

1 tomato

6 corn tortillas

3 lettuce leaves

Olive oil

Salt

Jamaican spice pepper

Curry powder

Yogurt  (or sour cream)

Some grated cheese


Preparation

Pre heat the oven to 200 degrees.

Place an empty frying pan on high. While the pan is heating, season the chicken with salt and the Jamaican spice pepper. Sprinkle some olive oil on the chicken, lower the heat to medium and place the chicken in the pan.

Put a cup of brown rice in a small pan. Season with salt and some curry powder, add two cups of boiling water and let it cook for ten minutes.

Slice the onion and the red pepper, cut the tomato in small pieces and slice the lettuce.

When the chicken is cooked, remove it from the pan and let it rest. In that same pan add the onion and red pepper and cook to your liking (we cooked it for about 5 minutes, or until the veggies were soft).

Take a large piece of greaseproof paper, put it under the tab and get it all wet. Squeeze it so that most of the water goes off, wrap the tortillas in it and put them in the oven for 3-4 minutes.

Before you serve your fajitas, slice your chicken pieces so that then can be better used in your tortilla.

When everything is done and ready, place in individual plates and assemble your fajitas to your liking. We added some yogurt and some shredded mozzarella, but you can also use some mexican salsa, guacamole or just about anything.

And, of course, let us know what you think.


Delicious Onion Pie

onionpie
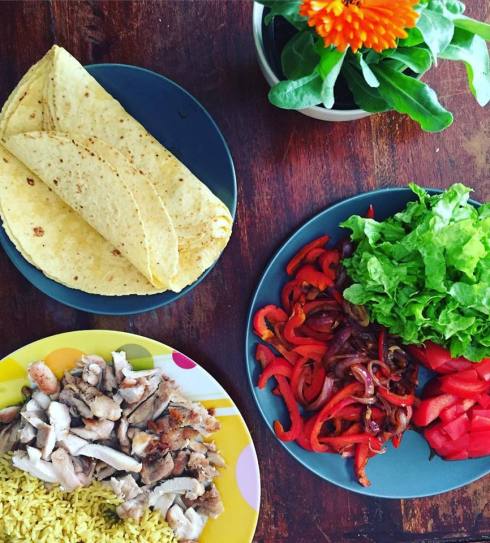
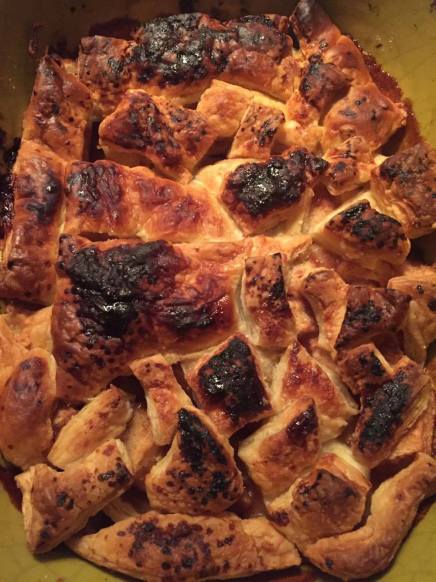
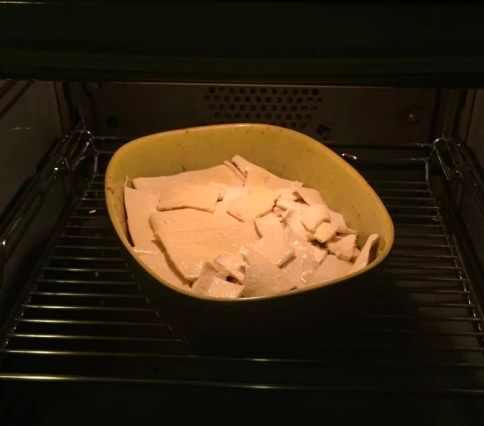
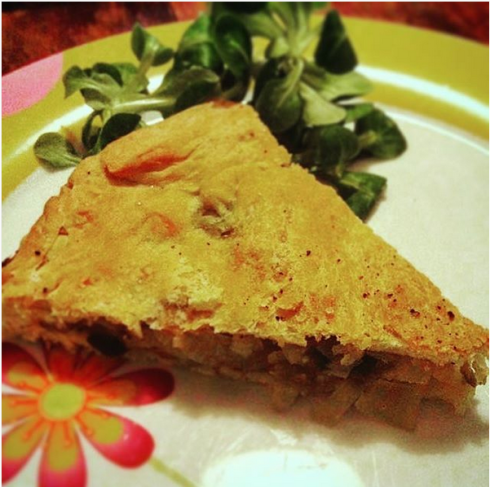
Last week we went to this place on via del Corso in Florence that sells mainly pies. The place is called “Pulia” and sells mainly dishes pugliesi, i.e. from Puglia. Everything was great, but what really stuck with me was the onion pie.

It was actually called “onion pizza”, but looked like a pie, and the dough was focaccia dough, and it’s all very complicated, so I think I may just have to move on to the recipe, because the recipe is actually much simpler than explaining the pie!


So, there you have it:

Onion Pie

300gr flour

10gr fresh yeast or 3gr dry yeast

200ml tepid water

5-6 onions (or scallions, or both, I used 5 regular onions and 2 scallions)

2-3 anchovies

a handful of olives (NOT pitted olives, nobody likes pitted olives)

salt, pepper, oil


Preparation

Add the yeast in the water and just stir it around with your hand until it dissolves. Add it in the flour and mix it, forming a dough. Add about a tsp of salt, 2 TB oil and work your dough until it is homogeneous and just a tiny little bit sticky. Leave it to double for about an hour.

Meanwhile, and while your dough is rising, preheat the oven at 200 degrees Celsius (400F) and chop the onions in thin slices. Add some oil in a pan and add the anchovies. Let them dissolve in the oil and add the onions, with a little salt. Lower the heat to medium-low and let the onions cook for about 20 minutes, until they are nice and soft. Then add the olives and some pepper. Give it a stir and remove it from the fire.

Now your dough must be double in size and your oven warm. Oil a 30cm pan and your hands. Take the dough and divide it in half, making sure that one piece is slightly larger than the other (slightly!). Roll it in a round that fits the bottom of the pan and place it in your pan. Put the onion mix over the dough in the pan and roll the other piece as well. Place it on top of the onions and seal the edges. Brush some oil on the surface and sprinkle some salt and pepper over it. Put it in the oven and let it bake for 30 minutes.

When it’s done, let it cool and enjoy it. Maybe with some red wine. Or tea. Or coffee. Oh, who am I kidding, just have the pie!

And as always, let me know

onionpie1


Strawberry and limoncello tiramisu

strawberry limoncello tiramisu

I do not have a sweet tooth, but every now and then I get a craving for something decadent. When I do, I make sure it is not the most decadent thing in the world (diet!), but lacks nothing in taste – or appearance.

That’s the category strawberry and limoncello tiramisu falls under. It has the potential to be extremely beautiful and inviting, if you have the transparent glasses to put it in (which I didn’t) and is very tasty – with the refreshing taste of the strawberry sided with the kick of the limoncello and the sweetness and crunchiness of the ladyfingers.

We went to a friendly home last night and the strawberry and limoncello tiramisu was the best thing I could think of, to bring to the party. The sweetness and the freshness, the kick and the crunchiness, the harmonious combinations of all flavors and smells that come together in a glorious party of all senses, and the way it cleanses your mouth and your soul, well, it just feels like the perfect paragon of friendship.

This is even easy to make. It requires no baking (well… tiramisu!) but it does contain eggs, so make sure your eggs are of excellent quality and can be eaten raw.


Strawberry and limoncello tiramisu

Makes 4 individual glasses (about 200ml each)


Cream

250gr mascarpone cheese (if yours is a bit runny like mine was, use a bit more, but don’t overdo it)

a small espresso cup of limoncello (about 30ml)

30gr powdered sugar

3 egg yolks


Limoncello mixture

Zest and juice of one lemon (unwaxed, please, no one likes wax in their tiramisu)

6 TB limoncello

1 to 1- 1/2 TB sugar

About 5 TB water


Rest

250gr strawberries

30gr sugar

10 ladyfingers (or more, depending on the shape of your glass)


Preparation

First prepare the cream. Beat the egg yolks with the powdered sugar with a hand mixer until creamy. Add the limoncello and keep beating. Start to slowly add the mascarpone, a little at a time. At this point, you can either use the hand mixer or an eggbeater. I tried the hand mixer but was afraid it was beating it way too much, so I used the eggbeater instead. You know your mixture (and mixer) better.

If your mixture is runny, add a little more mascarpone. I had to add about 70-80gr more, because the mascarpone we bought was watery. Don’t add too much, though, the taste will change.

Put your cream in the fridge and let it cool. As it cools, it will also firm.

Now prepare the limoncello mixture. Add everything in a bowl and mix it together. Put that in the fridge as well. Easy, right?

🙂

Now chop the strawberries in small pieces, add the sugar and some lemon juice if you have any left from the lemon you squeezed for the limoncello mixture, and set it aside.

When you are ready to put everything together, take all of your bowls and plates, the ladyfingers, and start:

Cut one ladyfinger in half and immerse it in the limoncello mixture BRIEFLY. When I say “briefly” I literally mean for less than a second. Not figuratively, literally. It touches the liquid and out it goes. Then at the bottom of your glass.

Next comes a layer of cream.

Then a layer of strawberries.

Then another layer of cream.

Then take another ladyfinger, cut it in half and do exactly what you did with the first one. Put it over the cream layer.

Then add another cream layer.

Then add some decoration, maybe half a strawberry or a few strawberry pieces.


Your sweet indulgence is ready, for you and your friends to enjoy.

Let me know what you thought!


Lentil Moussaka

7
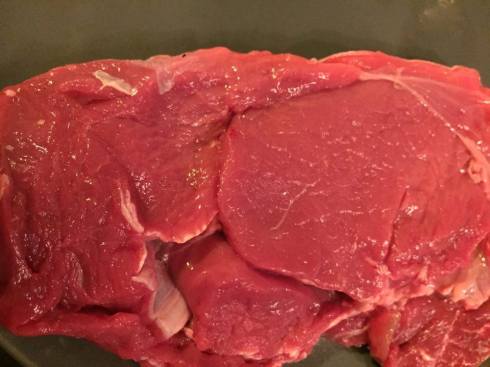
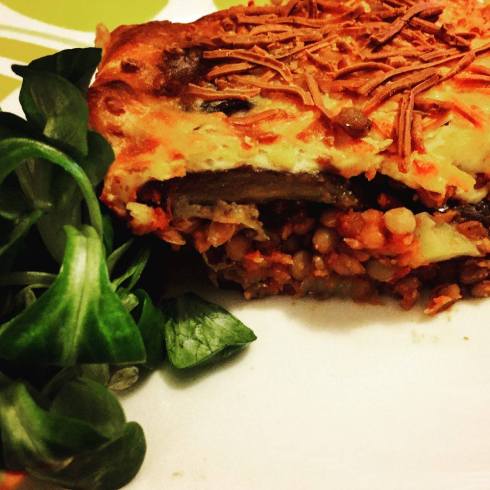
Leonardo Di Caprio won the Oscar for sleeping in a horse’s carcass. That alone, no matter how truly amazing he was in the movie (I can’t tell you, I haven’t seen it) makes us want to steer clear of meat for at least a few days, even if I have honestly been #teamLeo, ever since the Basketball Diaries, I swear.

We had some potatoes and some eggplants in the fridge, so Mr S and I looked at each other and telepathically decided to make a veggie moussaka.

I have had this book for a while, it is called The Hungry Student Vegetarian Cookbook and have only tried a few recipes, which turned out pretty good. It is a vegetarian book, one of those “Hungry student” things, and, honestly, I didn’t know what to make of it. But my first couple of efforts turned out ok, so I decided to give it another go.

Lentil Moussaka was right in there, so I thought “why not?”

Now, this recipe asks for a lentil moussaka without potatoes. Keeping in mind that recipes are merely suggestions, I tweaked it a bit, and I hope the author won’t mind. Because, honestly, I don’t know why anyone would skip the potatoes.

All the rest was awesome, though, so thumbs up, book!


Lentil Moussaka

6

1 large potato, cut in thin slices

For the filling

1 onion, chopped

2 garlic cloves

about 200gr lentils (more, less, I always opt for more) [See Note 1]

2 eggplants, sliced thinly (not paper-thin, let’s not go crazy. Normal) [See Note 2]

Cinnamon

Oregano

One can chopped tomatoes or about 1 – 1 1/2 cup tomato passata

Salt and pepper

For the topping

300gr full-fat greek yogurt

60gr flour

2 egg yolks

Grated cheese of your choice


Preheat the oven at 180 degrees Celsius

1

While the oven is preheating (seriously) place the sliced potato in a pan and stick them in there, seasoned with salt and pepper. Leave them there while you’re preparing the rest, making sure you don’t burn them. If you see them start to brown, take them out, we just want them to be nice and tender.

Heat the oil in a pan over medium heat and add the onion. Cook for five minutes, add the garlic and cook a couple of minutes more.

2

Add the eggplant and cook for about 15 minutes, until soft and starting to shrink. When you see that happening, add the tomato, the lentils, the cinnamon and oregano and season it well. Let it bubble.

While it is bubbling, add all the ingredients for the topping save the grated cheese in a bowl and whisk. Be careful because the flour will go everywhere! Do it slowly!

Once everything is done, it is time for the assembly. In a large baking dish, first layer the potatoes.3

Follow that with the lentil – eggplant mixture and then the topping. To make the topping go everywhere, just smooth it with the curved side of a large spoon towards the edge of the dish.

4

Sprinkle the grated cheese on top and put it in the oven. Bake for 35-40 minutes (depending on your oven).

5

We ate it so hot, I can still feel my tongue as we speak.

I hope you like it. Let me know what you think.


Note 1: I am really not used to canned lentils. I don’t get them. If I want lentils, I make them. That’s what I did here. I boiled about 200gr of lentils, a garlic clove and half an onion until they were done, and used that. But if you want to use canned lentils, by all means.


Note 2: I sliced the eggplants, but you can also cut them in small squares or rounds, whatever you like. Like I said, recipes are mere suggestions. Just make sure they are cooked.


Note 3 (unrelated to cooking): Out of all the gorgeous dresses from last night, Kate Blanchett completely nailed it. That dress on her, oh my, it was like Mother Nature hugged her, blessed her and sent her off to the Oscars. Good job, my lady.

cate-blanchett-oscars-2016-in-hollywood-ca-2-28-2016-2


Oscar night

IMG_2299

It’s Oscars night tonight and here at camp Chez Nous we are all very excited to once again celebrate that glorious fest that is this yearly ceremony.

We have The Booze, The Coffee, The Blankets and, naturally, The Food, that promises to get us through the small hours and keep us awake until Chris Rock says “Goodnight” and makes it yet again “legal” to yawn and fall asleep on the couch.

Of course, this year things will probably be different. My friend, A., my partner in Oscars-crime, lives hours away (by plane, mind you) and I have a class early in the morning, so it will be long before Chris Rock says “Goodnight” that it will actually be okay for me to shut my eyes and ZzzZZzzZZZzzZzZZzZZzz in front of the TV.

One thing won’t change: the food.

Since we will be catching the whole red carpet action before the actual awards (yasss!), I am sure to get The Guilt – you know, that feeling you get when Anne Hathaway looks gorgeous in a dress even your hanger doesn’t fit in, and you’re there, fingers yellow with Cheetos residue, mayo sandwiches and kreatopitakia winking at you from the end table, your pyjamas’ waistband leaving its mark on your skin.

So, this year we are going “light”.

No Cheetos, no kreatopitakia, just some salad, oven roasted potatoes and a steak. Yes, a steak.

And Spritz, of course, because, yeah… eh… it helps me sleep!

That’s my story and I’m sticking with it.


So, this is what will be happening in our apartment, about an hour before the red carpet starts. You can do it along with us and share your results


Oven Roasted Potatoes

12769452_10153562341781443_2019934781_n

About ½ kilo baby potatoes

2 garlic cloves

A few TBs olive oil (A few does not mean 20, it means about 4 – I may have used less)

Salt, pepper

Grated cheese (Parmiggiano is awesome, but, honestly, use the one you like best. Parmiggiano is the one I like best)

1 lemon


Preheat your oven at 200 degrees Celsius (400 Fahrenheit).

Make sure your potatoes are clean. I wash them, then scrub them, make sure there’s no dirt on them. That’s because we won’t peal them. If you peal baby potatoes, seriously, why? Why?

12767790_10153562340271443_982326078_n

Cut them in half and put them in a bowl. You want to choose the bowl wisely, because you will be serving your potatoes in that bowl. Toss them with the oil, the garlic cloves, salt and pepper and make sure every little potato-half is covered with that nice, garlic-y goo.

12576087_10153562340901443_1103547354_n

Place them on a rack, cut side up and put them in the oven, on the upper third. Bake them for 25-30 minutes, depending on how big your potatoes are.

Do not wash the bowl, you’ll need it. I saw that part on Epicurious, that guy was a genius.

12442781_10153562341406443_478779069_n

When they are nice and golden, take them out and place them back in the bowl. Toss them with the the cheese of your choice and put them back on the rack and back in the oven for another 10 minutes, or until your cheese is nice and melted.

Take them out, put them in the bowl and toss them in some lemon juice. Taste one for seasoning. Then steal another one before anyone sees you.

Serve.

If you want some extra heat, I suggest adding some red hot chili pepper along with the garlic and the oil, the salt and the pepper. Yum.


Steak

12784249_10153562341206443_501060072_n

About 450-500gr beef steak

Rock salt

Some olive oil

Pepper (optional)


This is the easiest thing ever. Our goal was to do “Bistecca alla fiorentina”, which is a T-bone steak grilled over a wood or charcoal fire, seasoned with salt and a little bit of black pepper, and olive oil, applied immediately after you take the meat out of the heat. Unfortunately for us our butcher shop was out of T-bone steaks when we went there, so we had to settle for a no bone steak. But we made sure to get a pretty thick and large cut so that it would be as close as possible to the “real thing”!

12804180_10153562340481443_478351899_n

So, no salt, no pepper, no nothing! Just place the meat on the grill and let the heat do its job. Cook the steak to your liking (5 minutes on each side did the job for us). Take the steak out of the fire, put it on a plate, season with some rock salt (you know, the one with the large sized grains, some black pepper and some olive oil and let it rest for a couple of minutes. That’s it!

rosemary

Some like to add herbs, after the steak is done, so rosemary, thyme, maybe some garlic (don’t overdo it). The secret is to let the herbs accompany the taste, not cover it! It’s all about the meat!

Enjoy it with some beer. Or some wine. We’ll be having both!

So that will be our Oscars feast. Let me know what you think – or what you made!


Katzenworld

Welcome to the world of cats!

Warning:Curves Ahead

reasonably photogenic and relatively stylish

Inside Kel's Kitchen

Love to eat, love to cook, and trying to keep it healthy!

inte fan gör det det

Alla säger:det ordnar sig....inte fan gör det det..

News, reviews and cooking tips

This blog focuses on current events, news stories and articles. You will also find theatre reviews, London life, vegetarian cooking, photography, scepticism and rants about Tony Blair

Cooking Up The Pantry

Feeding a hungry family!

Life made beautiful

life , Simply Everything.