Monthly Archives: March 2016

Cumin mushrooms and pancetta quesadilla

cumin mushroom quesadillaSaturday night usually calls for Supernatural. And Supernatural usually calls for a snack – mainly because Dean always eats something, and then we get start to drool and then we lose our concentration and the whole world knows that Supernatural demands our full attention, so we like to be prepared.

Last night we tried to keep it simple, because of everything that we have eaten these past few days. Our favorite Canteen reopening this Sunday was also a huge factor to our trying to keep the calorie intake to a minimum (well… ok… we’ll call this a “minimum” and we’ll all stay friends, ok?). When trying to do that, veggies help, and whole-wheat products help and, of course, pancetta doesn’t help much, but we’ll just keep this between us.

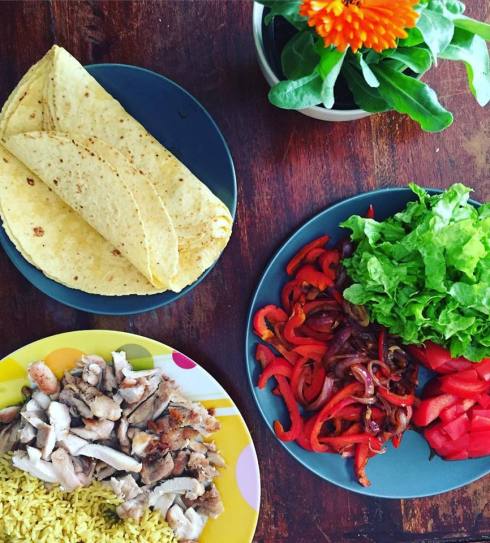
I won’t even call this a recipe. It is merely a suggestion for the next time you crave for something and don’t know what to make. Most houses have a few mushrooms, some tortillas, some pancetta (or bacon), some cheese, a few peppers…

By the way, there were no peppers in this house last night, so I didn’t use any, but I’ll add them to the “suggestion”, because I really wish there were.


Ingredients

250gr mushrooms, sliced

4 slices pancetta

½ onion

1 red bell pepper, sliced

4 slices yellow cheese (we used Gouda)

4 tortillas

A pinch of cumin


Preparation

Heat some oil in a large pan and add the pancetta to your desired doneness. Remove pancetta from the pan. Add the onion and the pepper and cook over medium heat until soft. Add the mushrooms, some salt and pepper and the cumin. Cook about 7-8 minutes, or until the mushrooms are done.

Remove from the pan. At this point, if you have a non-stick pan, don’t even bother with cooking spray. I used nothing and nothing stuck! If your pan is not non-stick, then add some cooking spray. Place one tortilla on the pan, over medium heat. On it, place a slice of cheese, some mushroom mixture, two pancetta slices and another cheese slice. Top it off with another tortilla. Cook on one side for about 3-4 minutes or until tortilla is nice and crispy. Very carefully flip your quesadilla over and cook it for another couple of minutes.

Remove it from the pan and place on a plate. Repeat for the second quesadilla.

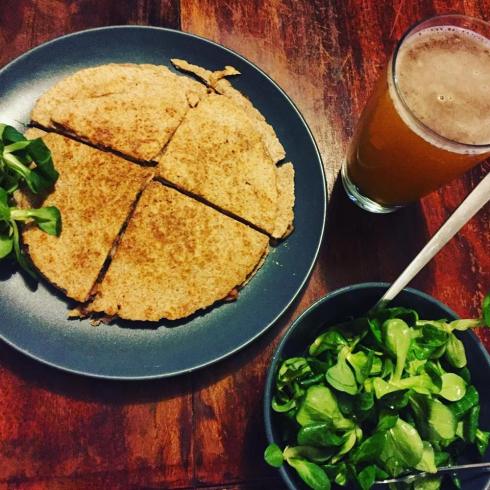
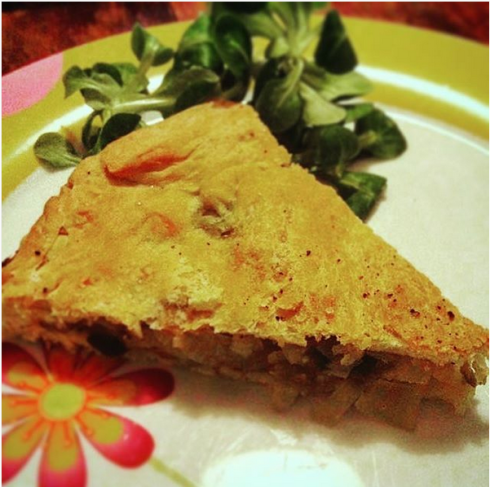
We placed one on top of the other, cut them both with a serrated knife in four and enjoyed it with some weissbier and a simple valeriana salad (dressed only with some salt, pepper, lemon and olive oil). And with Sam and Dean, of course!


Jamaican spiced chicken and curry flavored brown rice fajitas

Jamaican fajitas

It’s a sunny mid March Sunday, you go out for a stroll, maybe some coffee and some hanging out in the sun, and when you get back home you find yourself desperately looking for something nice to eat. Preferably something that can be prepared in no time and taste like, well… a sunny springtime Sunday.

So, how about some fajitas? Jamaican spiced chicken and curry flavored brown rice (basmati rice is also great) fajitas to be exact. That’s what we thought and fortunately for us, we thought about it before we went out for that stroll, which was helpful because it meant that we took the chicken out of the freezer so that it would be ready to be cooked by the time we came back!

(But, you know… Having a microwave that is not broken like ours is something that can do the defrosting job if you don’t think about cooking chicken before you go out for a walk!).

So. All you need is some chicken (we used three chicken thighs), a cup of rice (we used brown rice), an onion, a red pepper, one tomato, a couple of lettuce leaves, a few tortillas and about 30-35 minutes.


Ingredients

3 chicken thighs

1 cup of brown rice

1 onion

1 red pepper

1 tomato

6 corn tortillas

3 lettuce leaves

Olive oil

Salt

Jamaican spice pepper

Curry powder

Yogurt  (or sour cream)

Some grated cheese


Preparation

Pre heat the oven to 200 degrees.

Place an empty frying pan on high. While the pan is heating, season the chicken with salt and the Jamaican spice pepper. Sprinkle some olive oil on the chicken, lower the heat to medium and place the chicken in the pan.

Put a cup of brown rice in a small pan. Season with salt and some curry powder, add two cups of boiling water and let it cook for ten minutes.

Slice the onion and the red pepper, cut the tomato in small pieces and slice the lettuce.

When the chicken is cooked, remove it from the pan and let it rest. In that same pan add the onion and red pepper and cook to your liking (we cooked it for about 5 minutes, or until the veggies were soft).

Take a large piece of greaseproof paper, put it under the tab and get it all wet. Squeeze it so that most of the water goes off, wrap the tortillas in it and put them in the oven for 3-4 minutes.

Before you serve your fajitas, slice your chicken pieces so that then can be better used in your tortilla.

When everything is done and ready, place in individual plates and assemble your fajitas to your liking. We added some yogurt and some shredded mozzarella, but you can also use some mexican salsa, guacamole or just about anything.

And, of course, let us know what you think.


Delicious Onion Pie

onionpie
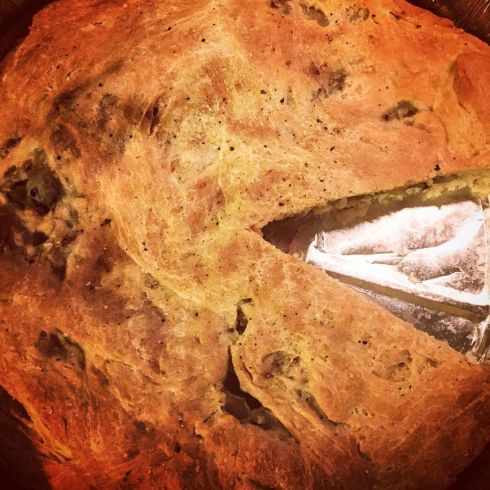
Last week we went to this place on via del Corso in Florence that sells mainly pies. The place is called “Pulia” and sells mainly dishes pugliesi, i.e. from Puglia. Everything was great, but what really stuck with me was the onion pie.

It was actually called “onion pizza”, but looked like a pie, and the dough was focaccia dough, and it’s all very complicated, so I think I may just have to move on to the recipe, because the recipe is actually much simpler than explaining the pie!


So, there you have it:

Onion Pie

300gr flour

10gr fresh yeast or 3gr dry yeast

200ml tepid water

5-6 onions (or scallions, or both, I used 5 regular onions and 2 scallions)

2-3 anchovies

a handful of olives (NOT pitted olives, nobody likes pitted olives)

salt, pepper, oil


Preparation

Add the yeast in the water and just stir it around with your hand until it dissolves. Add it in the flour and mix it, forming a dough. Add about a tsp of salt, 2 TB oil and work your dough until it is homogeneous and just a tiny little bit sticky. Leave it to double for about an hour.

Meanwhile, and while your dough is rising, preheat the oven at 200 degrees Celsius (400F) and chop the onions in thin slices. Add some oil in a pan and add the anchovies. Let them dissolve in the oil and add the onions, with a little salt. Lower the heat to medium-low and let the onions cook for about 20 minutes, until they are nice and soft. Then add the olives and some pepper. Give it a stir and remove it from the fire.

Now your dough must be double in size and your oven warm. Oil a 30cm pan and your hands. Take the dough and divide it in half, making sure that one piece is slightly larger than the other (slightly!). Roll it in a round that fits the bottom of the pan and place it in your pan. Put the onion mix over the dough in the pan and roll the other piece as well. Place it on top of the onions and seal the edges. Brush some oil on the surface and sprinkle some salt and pepper over it. Put it in the oven and let it bake for 30 minutes.

When it’s done, let it cool and enjoy it. Maybe with some red wine. Or tea. Or coffee. Oh, who am I kidding, just have the pie!

And as always, let me know

onionpie1


Strawberry and limoncello tiramisu

strawberry limoncello tiramisu

I do not have a sweet tooth, but every now and then I get a craving for something decadent. When I do, I make sure it is not the most decadent thing in the world (diet!), but lacks nothing in taste – or appearance.

That’s the category strawberry and limoncello tiramisu falls under. It has the potential to be extremely beautiful and inviting, if you have the transparent glasses to put it in (which I didn’t) and is very tasty – with the refreshing taste of the strawberry sided with the kick of the limoncello and the sweetness and crunchiness of the ladyfingers.

We went to a friendly home last night and the strawberry and limoncello tiramisu was the best thing I could think of, to bring to the party. The sweetness and the freshness, the kick and the crunchiness, the harmonious combinations of all flavors and smells that come together in a glorious party of all senses, and the way it cleanses your mouth and your soul, well, it just feels like the perfect paragon of friendship.

This is even easy to make. It requires no baking (well… tiramisu!) but it does contain eggs, so make sure your eggs are of excellent quality and can be eaten raw.


Strawberry and limoncello tiramisu

Makes 4 individual glasses (about 200ml each)


Cream

250gr mascarpone cheese (if yours is a bit runny like mine was, use a bit more, but don’t overdo it)

a small espresso cup of limoncello (about 30ml)

30gr powdered sugar

3 egg yolks


Limoncello mixture

Zest and juice of one lemon (unwaxed, please, no one likes wax in their tiramisu)

6 TB limoncello

1 to 1- 1/2 TB sugar

About 5 TB water


Rest

250gr strawberries

30gr sugar

10 ladyfingers (or more, depending on the shape of your glass)


Preparation

First prepare the cream. Beat the egg yolks with the powdered sugar with a hand mixer until creamy. Add the limoncello and keep beating. Start to slowly add the mascarpone, a little at a time. At this point, you can either use the hand mixer or an eggbeater. I tried the hand mixer but was afraid it was beating it way too much, so I used the eggbeater instead. You know your mixture (and mixer) better.

If your mixture is runny, add a little more mascarpone. I had to add about 70-80gr more, because the mascarpone we bought was watery. Don’t add too much, though, the taste will change.

Put your cream in the fridge and let it cool. As it cools, it will also firm.

Now prepare the limoncello mixture. Add everything in a bowl and mix it together. Put that in the fridge as well. Easy, right?

🙂

Now chop the strawberries in small pieces, add the sugar and some lemon juice if you have any left from the lemon you squeezed for the limoncello mixture, and set it aside.

When you are ready to put everything together, take all of your bowls and plates, the ladyfingers, and start:

Cut one ladyfinger in half and immerse it in the limoncello mixture BRIEFLY. When I say “briefly” I literally mean for less than a second. Not figuratively, literally. It touches the liquid and out it goes. Then at the bottom of your glass.

Next comes a layer of cream.

Then a layer of strawberries.

Then another layer of cream.

Then take another ladyfinger, cut it in half and do exactly what you did with the first one. Put it over the cream layer.

Then add another cream layer.

Then add some decoration, maybe half a strawberry or a few strawberry pieces.


Your sweet indulgence is ready, for you and your friends to enjoy.

Let me know what you thought!


Katzenworld

Welcome to the world of cats!

Warning:Curves Ahead

reasonably photogenic and relatively stylish

Inside Kel's Kitchen

Love to eat, love to cook, and trying to keep it healthy!

inte fan gör det det

Alla säger:det ordnar sig....inte fan gör det det..

News, reviews and cooking tips

This blog focuses on current events, news stories and articles. You will also find theatre reviews, London life, vegetarian cooking, photography, scepticism and rants about Tony Blair

Cooking Up The Pantry

Feeding a hungry family!

Life made beautiful

life , Simply Everything.